Recreating the town of Scarborough, Yorkshire: Post 1: Geography, Quodlibet 1264
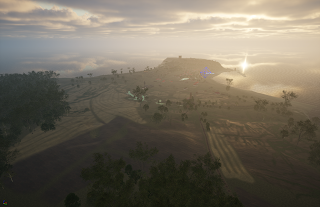
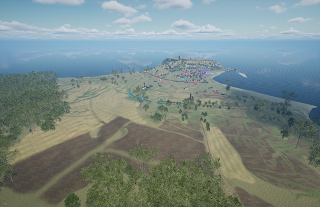
This is a step by step guide to building the 3-D geography of the port of Scarborough. Later posts will deal with landscape and (early/high medieval) building and set assets. This 3D landscape model is being used as a main set for the movie Quodlibet, which is presently being filmed. The lead character in the film, a healer from York, can be seen in some of the below images.
Why Scarborough?
As a young jurist, I became one of a handful of people responsible for reviewing the ancient written and once written laws of England, which at that stage, surprisingly, remained bedrock law in faraway Australia. My studies took me back to Saxon and Danish laws in force in pre-Norman England, and instilled in me an abiding interest in that period.
At the same time, I followed in Tolkien's footsteps, enjoying both his fantasies and his more serious work around the literature of the time (especially the Icelandic sagas). Inevitably, the law and Tolkien introduced me to the Law Speaker of the Icelandic Althing, Snorri Sturlason, and the Icelandic poet /warrior Kormac who led me to the coastal town of Scarborough.
Of course I knew the song. But, it turns out I did not understand it.
A little while back I finally turned from the law (with some relief) and started to hunt and catalogue the 15,000 lost waterfalls of SE Australia. Along the way, intertwined with relearning the ancient stories of this country, I found myself writing short stories and then a novel, Ancora Tu, based around Kormac's Saga. That time I found myself telling the stories from the vantage point of Betty, a New England librarian - and for a year I found myself in the glamor of the riddle that is the old song of lost love at Scarborough Fair. More recently, I have become involved in writing a new novel, Quodlibet, only to stumble onto the enormous canvass that is the history of the fair and the town, and a bunch of amazing folk at the Scarborough Archeological and Historical Society. The new novel is slowly moving off paper and into film, based on the town, as it was, in 1264.
Here is not the place to talk about the film's story - but a theme in the story revolves around the different recollections of the town, from the dawn of time, through Roman occupation, Saxon rule, religious, monastic and political strife through to our own strange modern time. Scarborough, on the sharp edge of the emerging kingdom, seems to have been a little different and a step ahead of the rest of English history. Perhaps one reason was its connections to the rest of the world (partly through the fair, but also the returning monks), or perhaps it was its ability to resist the wolves, real and human, that hounded its fate.
The rest of this post deals with how I have gone about creating Scarborough for cinematic purposes. Absolute reality is beyond my grasp - although, everyday, the amazing work of the Scarborough Archeological and Historical Society brings us a little closer to that goal.
Part One: Geography
The first step in creating the world of Scarborough involves recreating its natural features: the seascape, the headland (Castle Rock), the beaches and the inland forests. Less obvious is the realisation that Scarborough was a planned town - the southern slopes was extensively reworked into terraces to house the old town.
I chose to start that process using Unreal Engine ('UE' started its life as a games engine and is now becoming a powerful cinematic tool).
This process is a little like creating a set for a theatre production. However, at this stage, every part of the world will be open to cinematic technique - actors need to be able to move on a believable 1:1 scale surface - the sun must turn and throw shadows and light according to real-world constraints, the stars must shine, the sea must wash upon the shore, sometimes calm, sometimes changeable.
Surprisingly, many (but not all) of my cinematic needs are met by a 2km square map. 2km is sufficient to cover the old and new towns, as well as Castle Rock and the hinterlands.
Of course, from the town, you can see much further than the bounds of the map. This might be, in part, compensated using a skysphere with haze, to simulate far detail.
To be sure, a lot of the action takes place inside buildings and ships. I have also created a lot of differently sized 3D maps for this area for different purposes - but the technique I used for the main map (described below) can be easily adapted for other-sized maps.
The Main Map
For the Main Map, I found I needed two maps at this stage: a features map and a geography map which covered precisely the same area. For the purposes of UE, both maps needed to be exactly 2,011 square pixel image using a bicubic greyscale png form.
The features map requires as much research as you can give it. I spent months collecting maps and absorbing the history of the place and Yorkshire, spanning a number of centuries, and converting them into a single features map. I spent a lot of time decoding an old plat of the town and rebuilding the town as at 1538. Here I was looking for a mix of map detail that would help me place ancient roads, medieval buildings, walls, streams, and dykes - and, eventually, real people (or, at least, actors). Just as important were indications of modern earthworks that changed the shape of the environment (particularly modern roads or gravel pits) and which would need to be removed. Scarborough has had a number of cliff falls - the roman navigation tower has partially fallen into the sea, the old cemetery has also collapsed, and there is a record of at least one major collapse occasioned by earthquake). In modern times, earthworks have substantially reworked the town - but it is clear from the extensive earthworks in the old town that this refashioning of the environment started early - and one day we may find that some of this dates back much earlier: Scarborough is a planned town - street and building levels have been sculpted from the earth. I quickly found that there can be a lot of variation between the source maps - particularly old maps or scratch maps that locate buildings or features.
The geography map is not your ordinary sort of map. UE5 uses 'height maps' to build a 3D world surface - it is a greyscale record of surface height. I used Tangram Heightmapper to generate the area around Scarborough - https://tangrams.github.io/heightmapper/#15.33367/54.2849/-360.3999 Here I set it to record underwater details as well as above water. In the image below the sea is represented by black - while the higher headland is white.
[Notes: there are far more detailed 'height maps' - today it is possible to get high quality maps with ground resolution at 1m (eg, in the UK search for Lidar UK). Today, the region around Scarborough is significantly disrupted by recent human activity - so greater precision does not particularly help us here.]
TIP: I come back to this page when creating new sets for different locations. There is a simple shortcut to get you to any location in the world and display (roughly) a 2km (top of image to bottom) height map of the area. You can navigate to a location by going https://tangrams.github.io/heightmapper/ #scale / latitude (north+, south-) / longitude (East +). For example, the town of Crookwell in New South Wales (which features in the feature film "Long Tailor") has a lat of 34.4580° S, and a longitude of 149.4703° E. To get the 2km height map, i use a variable for scale of #15.33 and navigate to the outcome with https://tangrams.github.io/heightmapper/#15.33/-34.458/149.47) .
The Scale variable is a bit hit and miss. The scale variable will change from monitor to monitor, and as Tangram is a projected map, away from the equator there are stretching issues. On my monitor, I start with the following values to get the right top to bottom distance. Then I fine-tune. As a rough guide: #10 = 100km, #11.25 = 40km, #12.1 = 20km, #13.3 = 10km, #15= 4km, etc. To fine tune, compare with a map such as Google Earth where you can get precise N/S distances.
With Tangram, you can also get a faint overlay map of the town roads and the rivers by selecting "map lines" and "map labels" in the Tangram control panel - remember to turn these off for the height map - but it will be useful to also get a copy of this additional detail for set creation.)
The features map and the geography map need to cover precisely the same area - a fiddly business that requires a bit of trial and error.
TIP: Before proceeding, you will need to massage the maps into a 2011 pixel by 2011 pixel 16 bit grayscale png image - trying not to lose any detail. I use Photoshop to square off the area i want to work with (using Image:canvas size), then adjust the size to 2011 (using Image:image size to bring the size to 2011 selecting the bicubic smoother - enlargement option). If you are confident in using Layers in Photoshop and the images cover the same area, the process can be a lot faster - simply load both maps into the same file and do all the operations at the same time.
Unreal Engine requires the height map to be 16 bit greyscale - and while the x and y axis can take in more or less distance, the z axis (height) is fixed to values between -512 and +512. As with the map above - black (-512) represents the lowest ground while white (+512) represents the highest.
Note that you can download and use Unreal Engine 5 for free - but it is increasingly hungry for computer space, memory and graphic card power - so check out the requirements before jumping in. On the other hand, if you have been wasting your time playing higher end computer games in between mining cryptocurrency, you probably already have all the right gear - and this is the perfect time for a change of focus.
Having built the two maps - I opened UE5 and created a third-person project (this will enable you to 'walk-around' your world - an important part of this creative process). I then created a new 'Empty Level'. I then imported my features map dragging the png file into the Content Drawer.
At this stage you need to add light to your world - I opened the Environment Light Mixer and chose Create SkyLight, CreateAtmosphericLight0, CreateSkyAtmosphere, CreateVolumetricCloud and CreateHeightFog. Your grey mesh will turn into something that resembles a half baked loaf poking its way out of a bunch of steam.
Now we add water. We add the sea plane by opening Plugins and activating the water plugin. UE will restart. Click on OpenLevel and select your working level (the new one you saved a moment ago).
Open the 'place actors' panel and type in Water to find the water options. For the purposes of this walk through, I will spell out an 'easy' way of creating the water plane. A later post will detail how to deploy a water plane that has realistic waves, foam and surface details. The ocean around Scarborough is not a passive actor - a family of 19th century Scarborough painters were famed for producing images of the sea at its most violent, and most serene.
Click and drag WaterBodyCustom onto the map and drop it near the usual high water mark of the landscape mesh (use the line of the new port as a guide). At this stage it will be a drop of water. Open its details panel while it is still selected and adjust the scale to X:1000 Y:1000 and Z:1. You may need to adjust your world Z position a little so that the water moves up or down to your desired height (use the present port to help you out here). While moving the water plan around, reflect on the earthquake a couple of centuries back that emptied the bay for a while - and also on the fact that the port works had a long term impact on sanding up the South Sands and changing the alignment of the shore.
Adjust X and Y positions to ensure that the sea covers all the coast line areas. If you happen to navigate through the ground surface on the hill, you will see that the water is down there under that part of the map. Try not to spend a lot of time worrying about that or looking around for Pratchett's turtle, or his elephants (I checked, they are not there). Remember that this is Unreal.
A Background Map
Outlined in yellow in the following pics (taken from the top of Castle Hill) show the additional contribution of a background map extending out 20km. While the additional might be considered subtle - without this detail the scene is incomplete.
Late in development we decided that for some shots we needed to be able to show the shorelines stretching both north and south - as well as the hills to the west. The method of building this feature is a bit different to the process described above.
The background is essentially a 'prop' - for the purposes of the film we are not planning to build on it or shoot action in this area (where action does take place in later episodes, the towns of Whitby, Ravenclaw etc are built up in the same manner as described above with 1-2km landscapes.
This background map is built as a large 3D mesh. We start by getting a height map for a 20km square area as described above. However, we then build the mesh in Blender (see the neat tutorial from Jen Abbott at https://www.youtube.com/watch?v=9O9_H1WsDNk). The mesh is brought into Unreal and placed around our main map - and scaled until the features match height and distance considerations.
This additional element might have serious memory impacts - we took a number of steps to keep the impact small and converted the mesh to use nanite - and to remove it from the scene when it was not visible.
This overhead view shows the central main map (2km) surrounded by the background map (20km).
Note
* There is plenty of suggestions of a Viking port from Kormac's Saga and the Law Speaker Snorre Sturlason - but, frustratingly, apart from traces of a contemporaneous chapel, little archeological evidence.
Index of posts in the series "Recreating the town of Scarborough, Yorkshire, 1264"
1: Geography
3. Crucks, Siles and Forks of Yorkshire
5. Surviving Medieval Structures


.jpg)
.jpg)
.jpg)
.jpg)
.jpg)
.jpg)
.jpg)
.jpg)
.jpg)
.jpg)
.jpg)


.jpg)
.jpg)
.jpg)
.jpg)
.jpg)
.jpg)
.jpg)


.jpg)

.jpg)

.jpg)
.jpg)


Comments