Focus stacking using the Canon 5D Mk III
For most of us, focus stacking will be a bit of a niche technique used to give an object in a macro shot startling-good over-all focus. Some new cameras have it built in - but the rest of us have to find other ways and means. Focus stacking takes a little while to shoot - it doesn't work in a breeze.
For focus stacking you need to take lots of shots at slightly different focal lengths so that all parts of the object being shot is in focus in at least one shot. The Canon 5D Mk III (like many Canon and Nikon) can be tethered to a computer but the software from Canon (EOS Utility) or Adobe (Lightroom CC) does not allow you to directly control your lens. Good news: there is a work around.
This work-around requires:
- patience
- your camera with a lens you can take close ups with (a Macro lens)
- a tripod
- USB cable to connect computer and camera
- the Cannon EOS Utility - i found the latest version here
- software like Photoshop cc that will align multiple shots and combine the bits that are in focus.
Load the EOS Utility, choose the remote shooting menu item and get familiar with it (see the image below - the remote shooting screen is on the right). This is a cool feature letting you really nail focus. EOS Utility has a Liveview setting which you should use to achieve focal quality (see the image below - the Liveview panel on the left lets you move around inside the picture and zoom in while you manually adjust the focal length). Note that Lightroom Classic v10.11+ also has Liveview tethering for Canon, and enhanced zoom capability so it may be possible to simply work with that program.
Put your camera on a sturdy tripod, and place the object in range of the camera. Switch the camera off, connect the camera to your computer, turn the camera back on and kick off the EOS Utility. Select live view in EOS Utility and a screen will pop up streaming the camera view. Switch your camera focus to manual focus.
Using the computer view - and the 5X or 10X options, focus on the nearest part of the object and take the shot.
Then carefully adjust the focus manually - gently - and take shots at lots of further focus points until you have covered the entire object. Put a camera on a tripod and then touching the camera seems risky - and it is. Try to avoid camera shake as you work. You will end up with lots of shots. If any are blurred, the next step will discard them, but it is worth double checking you have nailed key features before moving into post production.
In Photoshop - simply load the images as layers, auto align and then auto blend.
Ok - you can do multiple shots with manual focusing without all of the above. So, what does this extra work actually give you. The answer is simple - the livescreen view in the EOS Utility gives you terrific control, and the ability to choose the focus segment with great precision. This might be, for example, important with those really important details - like the eyes of a spider.
I said at the outset that it is a niche technique. The work around here requires a bit of set up (with the subject brought within USB range of your computer - although maybe you can do it in the field with a laptop), and can take some time. In some situations you can simply put the camera on high speed and fly through lots of focus range without the effort to nail focus here using EOC Utility. Before going to a lot of additional effort, look at whether your shot needs it. Can you catch the depth of field with better lighting or camera settings.
Studio 'live view focus' stacked
(fairly even focus stacking)
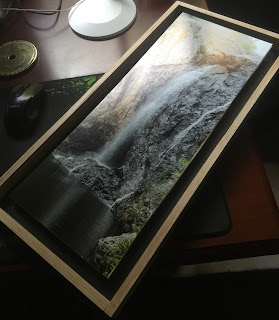
Outdoor 'high speed and twirl the focus rim' stacked
(note OOF spots - better than no shot)
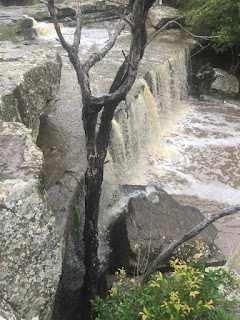
There are a couple of photo apps that will take shots on an iPhone at different focal ranges - Basic Pixel Pixel Camera Lite is free. You will still need to bring it to software which will combine the images. It is not going to work well in a breeze, or if the iPhone moves, and the quality might be a bit disappointing. Might work in specific situations.
iPhone Pixel Camera focus stacked in a breeze
(took a great deal of manual adjustment to get to this state)


Comments
It'll be a bit cumbersome for field work, but worth a try (When there is no breeze😊)